Add Pages and Sections to a Converted Theme
Add new pages to live WPConvert themes with the Page Importer plugin, or add sections manually — without full re-conversion.
You converted your AI-built site, launched it, and everything looks great. Then you need a new Pricing page, an extra Services section, or a seasonal landing page.
You do not have to re-convert the entire site.
WPConvert's Add a Page feature installs a single new page into your live theme. For smaller changes, you can add a new section to an existing page with a quick template edit.
This guide covers both workflows.
Why not re-convert for one page?
Re-converting a finished site to add one page causes problems:
- You lose post-launch edits — WPConvert Editor changes and wp-admin updates live in your current install
- It uses a conversion credit — a full re-conversion counts against your quota
- Menu and layout drift — re-importing can reshuffle menus and overwrite Appearance tweaks
- It is slow — rebuilding the entire theme for one page is wasted time
The fix is additive: add the new page or section on top of the theme you already have.
Option 1: Add a whole new page (Add a Page)
The Add a Page feature builds a single-page add-on for your existing theme. Available on Pro, Agency, and PAYG plans. Adding a page does not use a monthly conversion credit.
What Add a Page does
When you upload a new page's files, WPConvert:
- Generates a matching template using your theme's structure and class names
- Scopes the new page's CSS to that page only — other pages are unaffected
- Builds a WPConvert Page Importer plugin that installs the template, assets, and WordPress Page
- Stays additive — never overwrites your existing theme files
If anything looks wrong, deactivate the importer plugin.
Prepare your page ZIP
Pack the rendered page — not a lone source file.
Recommended (most reliable)
- Open the finished page in your browser (preview, live URL, or local dev server).
- Save or export so you have the HTML file and its assets (CSS, JS, images) in one folder.
- Name the main file
index.htmlif it is the only page in the zip. - If you used browser Save Page As, zip both the
.htmlfile and its companion_filesfolder.
Also works — full project export
Upload a complete React/Vite/Next.js project zip (with package.json), same as a normal conversion. WPConvert snapshots the app's entry route — usually the homepage. The slug you enter sets the WordPress URL only; it does not choose which in-app route gets rendered. If your new page is not the homepage, use the static HTML export approach.
Won't work on its own
- A single component or page source file (e.g. one
.jsxor.tsxfile) - Images or CSS with no HTML page
- Only the assets /
_filesfolder (missing the.htmlfile)
Step-by-step: Add a Page
- Prepare the new page as a ZIP using the guide above.
- Open your dashboard → My Conversions.
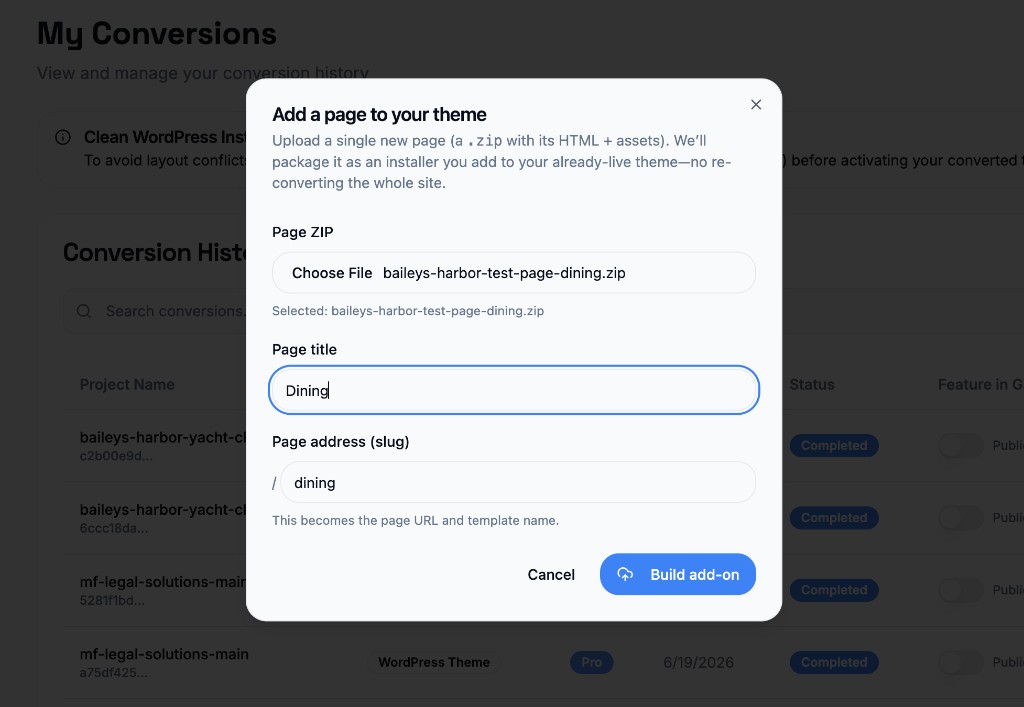
- Click Add a page. Upload the ZIP, set a title, and set the slug (e.g.
pricing→yoursite.com/pricing). - Download the generated importer — WPConvert builds the WPConvert Page Importer plugin ZIP.
- In WordPress: Plugins → Add New → Upload Plugin → install and activate the importer.
- The new page, template, and assets are added automatically.
- Add the page to your menu under Appearance → Menus.
After import
- Edit static content on the new page with the WPConvert Editor on the front end
- Deactivate the importer plugin if you need to remove the page add-on
Option 2: Add a section to an existing page
For a new block on an existing page (e.g. a testimonials section on your homepage), edit the page template directly.
Step-by-step
- Identify the template file — usually
page-home.php,front-page.php, orpage-{slug}.phpin your theme. - Open Appearance → Theme File Editor (or edit via SFTP).
- Find a sibling
<section>with similar styling to what you want. - Copy the entire section — including wrapper classes — so your new block inherits theme CSS.
- Paste your new content inside the copied structure.
- Save and preview on the front end.
- Edit the new content with the front-end editor if regions are marked editable.
Tips
- Copy structure, not just inner HTML — wrapper classes control spacing and responsive behavior
- Keep one H1 per page for SEO
- Test mobile breakpoints after adding a section
Add to navigation
After adding a page or section with a new route:
- Appearance → Menus
- Add the new page to your header or footer menu
- Save the menu